 Sign in
Adding projected shadow to icons
Shadows can be either trivial, when the shadow shape copies the shape of the object casting it and is slightly blurred and shifted, or they may be realistic, when light sources in 3D space shine on opaque objects and they are casting shadows.
The projected shadow lies between these two extremes. It lets you project the shape of the image on a horizontal plane and apply perspective distortion. Similar shadow effect is used on large images in Windows Vista icons.
How to add projected (Vista) shadows to icons?
Open an icon and switch to the Projected shadow tool. Move your mouse to a point, where the objects touches the ground. Press and hold the left mouse button and move the mouse upwards. The shadow will appear behind the object on the icon.
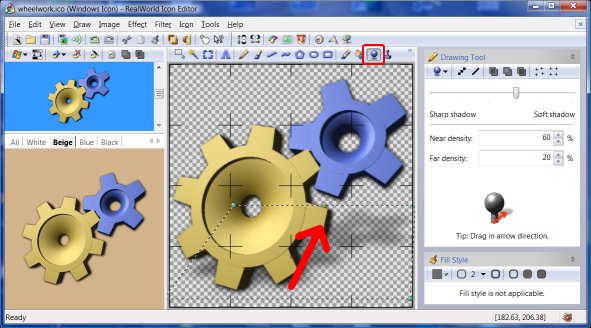
After you release the mouse button, the shadow is added to the raster editor window and you can further modify it:
- Move the shadow by dragging it.
- Adjust shadow shape by dragging the control handles.
- Change properties (density, sharpness) in the Drawing Tool panel by the right side of the window.
When you are happy with the shadow apply it by a Down-Right mouse gesture, by pressing Enter or by clicking the Apply button in the toolbar.
 Recent comments
 reddit
 Facebook share