 Sign in
 Anonymous
on February 18th 2013
0
Anonymous
on February 18th 2013
0
😊 very good
This tutorial shows the basic skin smoothing technique using the ALPHA_BRUSH tool in RealWorld Photos. Other RealWorld applications can be used as well, but the ALPHA_BRUSH tool must be added to the configuration manually.
Smoothing tips:
Click on image to zoom in.
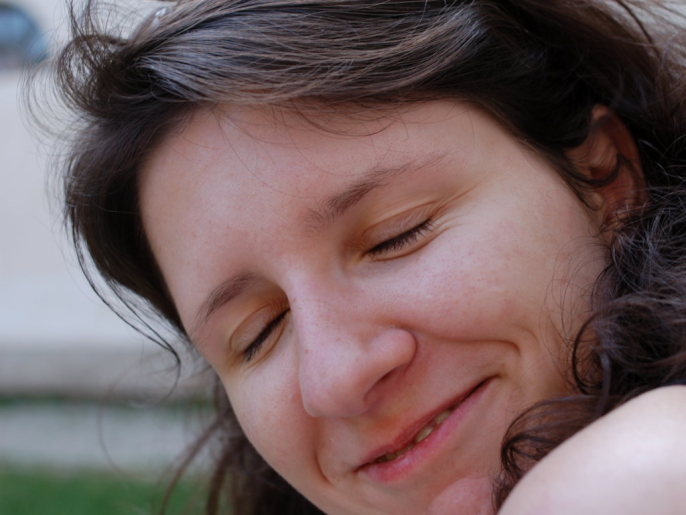 Original image before smoothing. |  Image after skin smoothing. |
Welcome to the skin smoothing tutorial for RealWorld Photos.
First, open a picture of your choice. I'll open one by dragging and dropping it from a file manager to the application window.
Once it is open, duplicate the background layer. I'll actually do a third copy to be able to quickly compare the retouched picture with the original one at the end of this video. You do not need to do this third copy. I'll also rename the layers for better orientation and I'll disable the third layer.
Now, select the background layer, run the blur filter and adjust the blur amount. Focus only on the skin and use the smallest value that still makes the skin soft.
The picture has not changed, because the blurred background is behind the duplicated layer. Select this layer and click on the Decrease opacity tool in the popup menu under the Tool presets button. This tool can be used to lower the opacity in selected regions of the current layer. This makes the blurred background visible.
Use this tool similarly as the Brush tool. Paint everywhere on the skin, but avoid the important features that you want preserved. The quality of this video makes it difficult to see the subtle differences between the smoothed and not smoothed skin. Follow the link in the description of this video to see the original and the retouched pictures in full quality.
The current tool is based on the Brush tool and therefore you can adjust its properties in a similar way. You can decrease the brush radius to be more accurate and you can increase or decrease the sharpness and flow values as well.
This technique of skin retouching is one of the fundamental ones and it provides very good results in a large number of cases. There are of course more techniques addressing other aspects of face retouching, but they are out of scope of this tutorial.
A similar technique is available in many other retouching applications, hence you may be already familiar with it. What we are doing right now is modifying a mask attached to a layer. In RealWorld Photos, each layer has a mask by default, so there is no need to explicitly enable it. Instead, we are using the modified brush to draw into the mask.
RealWorld Photos is able to losslessly resave pictures in the .jpg format. This also applies to pictures retouched using the method shown in this tutorial. If you are using .jpg files, the quality of the unchanged parts will not be decreased when using RealWorld Photos. This is not the case with other editors, including Photoshop.
Be careful not the blur the features that should remain sharp. If it happens, simple use the undo function.
Now, when the retouching is done, we can have a look at what was actually done. I'll re-enable the third to show you the difference. By clicking on the "Show final image" button in the toolbar, we switch between the viewing the current layer and all layers. You can see the holes made to the current layer. The Decrease opacity tool has a sibling that can revert its effects. The difference between them is the current color used. Black color means transparent, white color means opaque. You could also pick a gray color if you wanted for an usual task.
Be careful with skin retouching. It is very easy to overdo it. Make a photo too perfect and people lose their emotional connection to it. As always, less could be actually more.
Thanks for watching.
 Recent commentsAnonymous
on February 18th 2013
0
Recent commentsAnonymous
on February 18th 2013
0
😊 very good
Anonymous
on April 12th 2013
0
😎
Anonymous
on July 21st 2013
0
oh oh from yasir.gwd@gmail.com
raellen
on August 20th 2013
0
U.u 😁
Anonymous
on September 2nd 2013
0
good
Anonymous
on October 27th 2019
0
:-)thanks , it works great.
Anonymous
on August 6th 2020
0
Nice
 reddit
 Facebook share